
Bleaching a Pumpkin: A Comprehensive Guide to Disinfection and Decoration
Pumpkins, with their vibrant colors and versatile forms, are quintessential symbols of autumn. Whether you’re carving a spooky jack-o’-lantern for Halloween or creating an elegant centerpiece for Thanksgiving, pumpkins are a popular choice. However, the organic nature of pumpkins makes them susceptible to mold and decay, shortening their lifespan. Bleaching a pumpkin is a method used to disinfect and preserve these gourds, extending their decorative appeal and reducing the risk of rot. This comprehensive guide will walk you through the process of bleaching a pumpkin, explaining the benefits, providing step-by-step instructions, and offering alternative preservation techniques. By learning how to properly bleach a pumpkin, you can ensure your autumnal decorations last longer and remain visually appealing throughout the season.
Why Bleach a Pumpkin? The Benefits Explained
Before diving into the how-to, let’s understand why bleaching a pumpkin is a worthwhile endeavor. The primary reasons include:
- Disinfection: Pumpkins are prone to mold and bacteria growth, which accelerates their decomposition. Bleach effectively kills these microorganisms, slowing down the rotting process.
- Preservation: By eliminating harmful bacteria, bleaching a pumpkin can significantly extend its lifespan, allowing you to enjoy your decorations for a longer period.
- Cleaning: Bleach can help remove dirt, grime, and surface mold, leaving your pumpkin looking cleaner and brighter.
- Preparation for Painting: A clean, disinfected surface is ideal for painting. Bleaching a pumpkin creates a smooth and sanitized canvas for artistic endeavors.
Materials You’ll Need to Bleach a Pumpkin
Gather these essential items before you begin:
- Bleach: Regular household bleach (sodium hypochlorite) is the key ingredient.
- Water: You’ll need water to dilute the bleach.
- Large Container: A bucket, tub, or sink large enough to fully submerge the pumpkin.
- Gloves: Protect your hands from the bleach solution.
- Eye Protection: Safety glasses or goggles are recommended to prevent splashes.
- Measuring Cup: For accurate bleach dilution.
- Scrub Brush (Optional): For removing stubborn dirt.
- Clean Towels: For drying the pumpkin.
Step-by-Step Guide: How to Bleach a Pumpkin
Follow these instructions carefully to bleach a pumpkin effectively and safely:
Step 1: Prepare the Bleach Solution
The recommended bleach-to-water ratio is typically 1 part bleach to 10 parts water. For example, if you’re using a gallon of water, add approximately 1 1/4 cups of bleach. Always add bleach to water, never water to bleach, to avoid potentially dangerous reactions. Mix the solution thoroughly in your large container.
Step 2: Clean the Pumpkin (Optional)
If your pumpkin is particularly dirty, use a scrub brush and mild soap to remove any excess dirt or debris before bleaching. Rinse thoroughly with clean water.
Step 3: Submerge the Pumpkin
Carefully submerge the entire pumpkin in the bleach solution. Ensure that the pumpkin is completely covered. If it floats, you may need to weigh it down with a heavy object, such as a brick or a sealed container filled with water.
Step 4: Soak the Pumpkin
Allow the pumpkin to soak in the bleach solution for at least 2 hours, and up to 24 hours for heavily soiled or moldy pumpkins. The longer the soak, the more effective the disinfection will be. However, monitor the pumpkin periodically to ensure it doesn’t become overly bleached, which can weaken the rind.
Step 5: Rinse Thoroughly
After soaking, remove the pumpkin from the bleach solution and rinse it thoroughly with clean water. Make sure to remove all traces of bleach to prevent any lingering odor or potential harm.
Step 6: Dry Completely
Use clean towels to dry the pumpkin completely. Pay attention to any crevices or areas where moisture might accumulate. Allow the pumpkin to air dry in a well-ventilated area for several hours or even overnight to ensure it is completely dry before decorating or storing it.
Safety Precautions When Bleaching a Pumpkin
Working with bleach requires caution. Keep these safety tips in mind:
- Ventilation: Work in a well-ventilated area to avoid inhaling bleach fumes.
- Skin Protection: Always wear gloves to protect your skin from irritation.
- Eye Protection: Wear safety glasses or goggles to prevent bleach from splashing into your eyes.
- Avoid Mixing with Other Chemicals: Never mix bleach with ammonia or other cleaning products, as this can create toxic gases.
- Keep Away from Children and Pets: Store bleach out of reach of children and pets.
- Dispose of Properly: Dispose of the bleach solution responsibly, following local regulations.
Alternative Preservation Methods for Pumpkins
While bleaching a pumpkin is an effective method, there are alternative preservation techniques you might consider:
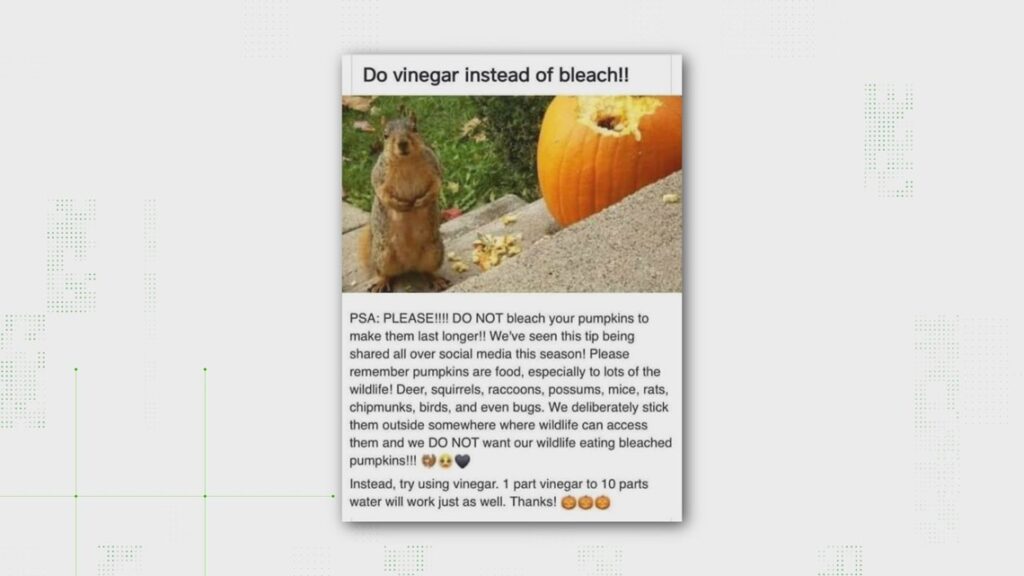
- Vinegar Soak: Soaking the pumpkin in a vinegar solution (1 part vinegar to 10 parts water) can also help kill bacteria and slow down decay. This is a less harsh alternative to bleach.
- Petroleum Jelly: Applying a thin layer of petroleum jelly to the cut surfaces of a carved pumpkin can help prevent moisture loss and reduce the risk of mold growth.
- Acrylic Spray: Sealing the pumpkin with an acrylic spray can create a protective barrier against moisture and bacteria.
- Silica Gel Packets: Placing silica gel packets inside a carved pumpkin can help absorb excess moisture and prevent mold growth.
- Refrigeration: Storing uncarved pumpkins in a cool, dry place, such as a refrigerator or basement, can significantly extend their lifespan.
Troubleshooting Common Issues
Here are some common issues you might encounter when bleaching a pumpkin and how to address them:
- Uneven Bleaching: If the pumpkin is not fully submerged or if the bleach solution is not properly mixed, you may experience uneven bleaching. Ensure the pumpkin is completely covered and that the solution is well-mixed.
- Weakened Rind: Over-bleaching can weaken the pumpkin’s rind, making it more susceptible to damage. Monitor the pumpkin during the soaking process and reduce the soaking time if necessary.
- Lingering Odor: If the pumpkin retains a bleach odor after rinsing, try soaking it in a solution of water and baking soda for a few hours.
- Mold Regrowth: If mold reappears after bleaching, it may indicate that the pumpkin was not thoroughly disinfected. Repeat the bleaching process, ensuring a longer soaking time.
Creative Uses for Bleached Pumpkins
Once you’ve successfully bleached a pumpkin, the possibilities are endless. Here are some creative ideas:
- Painted Pumpkins: Use acrylic paints to create intricate designs or patterns on the bleached surface.
- Decoupage: Apply decorative paper or fabric to the pumpkin using decoupage techniques.
- Glitter Pumpkins: Cover the pumpkin in glue and sprinkle with glitter for a dazzling effect.
- Monogrammed Pumpkins: Personalize the pumpkin with your initials or a family name.
- Elegant Centerpieces: Use bleached pumpkins as part of a sophisticated Thanksgiving or autumn-themed centerpiece.
Conclusion: Extending the Life of Your Autumn Decorations
Bleaching a pumpkin is a simple yet effective method for disinfecting, preserving, and preparing pumpkins for decoration. By following the steps outlined in this guide and taking the necessary safety precautions, you can significantly extend the lifespan of your autumnal decorations and enjoy their beauty for a longer period. Whether you’re aiming to prevent mold, create a clean canvas for painting, or simply prolong the festive spirit, bleaching a pumpkin is a valuable technique to have in your arsenal. So, embrace the season, grab a pumpkin, and get bleaching! [See also: Painting Pumpkins: A Step-by-Step Guide] [See also: Pumpkin Carving Safety Tips] [See also: Natural Pumpkin Preservation Methods]
