
How to Fix a Rusty Bicycle Chain: A Comprehensive Guide
A rusty bicycle chain is more than just an eyesore; it’s a performance killer. Rust increases friction, making pedaling harder, wearing down your gears faster, and potentially leading to chain breakage. Learning how to fix a rusty bicycle chain is an essential skill for any cyclist, saving you money on repairs and ensuring a smoother, more enjoyable ride. This guide provides a comprehensive, step-by-step approach to removing rust and restoring your chain to optimal condition.
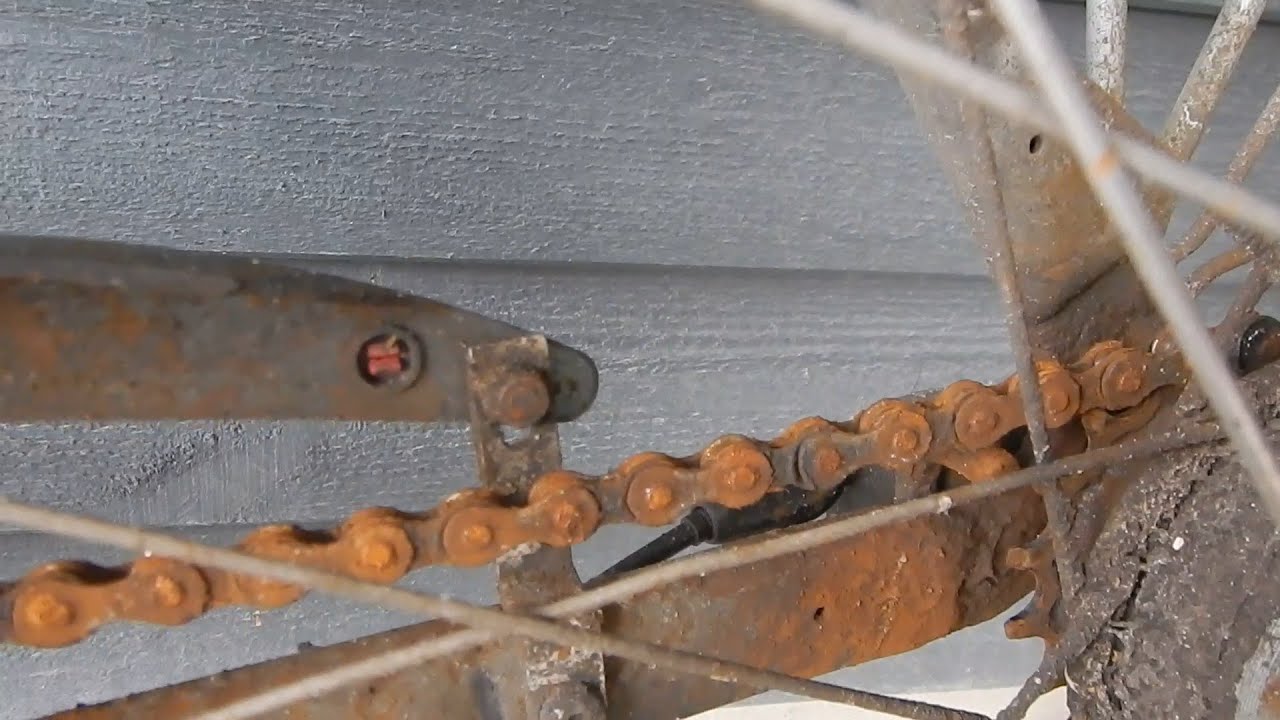
Understanding the Problem: Why Bicycle Chains Rust
Before diving into the solution, it’s crucial to understand why bicycle chains rust in the first place. Rust, scientifically known as iron oxide, forms when iron (the primary component of most bicycle chains) reacts with oxygen and moisture. Several factors contribute to this process:
- Exposure to Water: Rain, puddles, and even humid air accelerate rust formation.
- Lack of Lubrication: Chain lubricant creates a protective barrier against moisture and friction. When this barrier is absent or worn down, the chain becomes vulnerable.
- Salt: Saltwater and road salt (used in winter to de-ice roads) are particularly corrosive.
- Neglect: Simply not cleaning and maintaining your chain regularly allows rust to accumulate over time.
Tools and Materials You’ll Need
Having the right tools and materials is essential for effectively fixing a rusty bicycle chain. Here’s a list of what you’ll need:
- Chain Breaker Tool: To remove the chain from your bicycle.
- Degreaser: A specialized bicycle degreaser or citrus-based degreaser works best. Avoid harsh chemicals like bleach.
- Chain Cleaning Tool (Optional): A chain cleaning device can speed up the cleaning process.
- Stiff Brush: A toothbrush or small parts cleaning brush.
- Rags or Shop Towels: For wiping and cleaning.
- Chain Lube: A quality bicycle chain lubricant. Choose a wet or dry lube depending on your riding conditions.
- Gloves: To protect your hands from grease and chemicals.
- Container: For soaking the chain in degreaser.
- Safety Glasses: To protect your eyes from splashes.
Step-by-Step Guide: How to Fix a Rusty Bicycle Chain
Now, let’s get to the core of the matter: how to fix a rusty bicycle chain. Follow these steps carefully for the best results:
Step 1: Remove the Chain
Using your chain breaker tool, carefully separate the chain. Most modern chains have a master link (also known as a quick link) that can be easily removed without tools. If your chain doesn’t have a master link, use the chain breaker to push out a pin. Remember which pin you removed, as you’ll need to reconnect the chain at the same point.
Step 2: Degrease the Chain
Place the chain in your container and pour in the degreaser. Ensure the chain is completely submerged. Let it soak for at least 15-30 minutes. This will loosen the rust and grime. If you have a chain cleaning tool, follow the manufacturer’s instructions to clean the chain with degreaser.
Step 3: Scrub Away the Rust
After soaking, remove the chain from the degreaser and use your stiff brush to scrub away the remaining rust and grime. Pay close attention to the rollers and crevices of the chain. Rinse the chain thoroughly with water.
Step 4: Dry the Chain
Completely dry the chain with rags or shop towels. You can also use compressed air to speed up the drying process. Make sure there is no remaining water, as this will encourage rust to re-form.
Step 5: Inspect for Damage
Carefully inspect the chain for any signs of damage, such as bent links, stiff joints, or excessive wear. If you find any significant damage, it’s best to replace the chain entirely. [See also: When to Replace Your Bicycle Chain]
Step 6: Lubricate the Chain
This is a crucial step. Apply chain lube to the entire length of the chain, ensuring that the lubricant penetrates all the rollers and links. Wipe off any excess lube with a clean rag. Too much lube can attract dirt and grime.
Step 7: Reinstall the Chain
Reinstall the chain on your bicycle, using the chain breaker tool or master link to reconnect it. Make sure the chain is properly threaded through the derailleurs and over the cogs.
Step 8: Test Ride and Adjust
Take your bike for a short test ride and listen for any unusual noises or shifting problems. If necessary, adjust the derailleurs to ensure smooth and precise shifting. [See also: Adjusting Your Bicycle Derailleurs]
Alternative Methods for Removing Rust
While degreasing and scrubbing are the most common methods, here are a few alternative approaches for fixing a rusty bicycle chain:
- Vinegar Soak: Soaking the chain in white vinegar can help dissolve rust. However, be sure to rinse thoroughly and lubricate immediately afterward to prevent further corrosion.
- Citric Acid: Similar to vinegar, citric acid can be used as a rust remover.
- Commercial Rust Remover: Several commercial rust removers are available. Follow the manufacturer’s instructions carefully.
- Ultrasonic Cleaner: An ultrasonic cleaner can effectively remove rust and grime from hard-to-reach areas.
Preventing Future Rust
Prevention is always better than cure. Here are some tips to help prevent your bicycle chain from rusting in the future:
- Regular Cleaning and Lubrication: Clean and lubricate your chain regularly, especially after riding in wet or dirty conditions.
- Use a Quality Chain Lube: Choose a chain lube that is appropriate for your riding conditions. Wet lubes are best for wet conditions, while dry lubes are better for dry and dusty conditions.
- Store Your Bike Indoors: When possible, store your bike indoors to protect it from the elements.
- Wipe Down Your Chain After Riding: Wipe down your chain with a clean rag after each ride to remove any dirt or moisture.
- Consider a Chain Oiler: Automatic chain oilers can provide consistent lubrication and help prevent rust.
When to Replace Your Bicycle Chain
Even with the best care, bicycle chains eventually wear out. A worn chain can damage your gears and lead to poor shifting performance. Here are some signs that it’s time to replace your chain:
- Stretching: Use a chain checker tool to measure chain stretch. If the chain is stretched beyond the recommended limit, it needs to be replaced.
- Skipping: If the chain skips on the gears, it’s likely worn and needs to be replaced.
- Stiff Links: If the chain has stiff links that don’t move freely, it may be damaged or worn.
- Mileage: As a general rule, replace your chain every 2,000-3,000 miles, depending on your riding conditions and maintenance habits.
Conclusion
Knowing how to fix a rusty bicycle chain is a valuable skill that can save you time, money, and frustration. By following the steps outlined in this guide, you can effectively remove rust, restore your chain to optimal condition, and enjoy a smoother, more efficient ride. Remember to prioritize regular maintenance and preventive measures to keep your chain in top shape and prolong its lifespan. A well-maintained chain is a key component of a well-performing bicycle. So, grab your tools, get to work, and enjoy the ride!
