
How to Get Paint Scrapes Off Your Car: A Comprehensive Guide
Discovering paint scrapes on your car is never a pleasant experience. Whether it’s a minor brush against a bush or a more significant encounter with another vehicle, those unsightly marks can detract from your car’s appearance and potentially lower its value. Fortunately, dealing with paint scrapes doesn’t always require a trip to the body shop. With the right tools, techniques, and a bit of patience, you can often remove or significantly reduce the visibility of these blemishes yourself. This guide provides a comprehensive overview of how to get paint scrapes off your car, covering everything from assessing the damage to the final polishing steps.
Understanding the Severity of the Scratch
Before you start any repair work, it’s crucial to assess the depth and severity of the paint scrapes. This will determine the best approach and the likelihood of a successful DIY repair.
Clear Coat Scratches
These are the most superficial types of paint scrapes, affecting only the clear coat layer of your car’s paint. They often appear as light, hazy scratches that can be felt with your fingernail, but not deeply. Clear coat scratches are usually the easiest to repair.
Paint Scratches
These scratches penetrate the clear coat and reach the color coat, also known as the base coat. They are more visible and may show the underlying primer if the scratch is deep enough. Repairing paint scrapes that reach the color coat requires more effort and may involve touching up the paint.
Primer and Metal Scratches
The most severe type of paint scrapes go through the clear coat, color coat, and primer, exposing the bare metal underneath. These scratches require immediate attention to prevent rust and corrosion. They typically necessitate professional repair, although smaller areas can be addressed with a careful DIY approach.
Essential Tools and Materials
Having the right tools and materials on hand is essential for effectively removing paint scrapes. Here’s a list of what you’ll need:
- Car Wash Soap: For cleaning the affected area.
- Microfiber Towels: Soft and non-abrasive for drying and polishing.
- Clay Bar: To remove contaminants from the paint surface.
- Detailing Spray: Used with the clay bar to lubricate the surface.
- Scratch Remover Compound: Specifically designed to remove or reduce the appearance of scratches.
- Polishing Compound: To refine the finish after using the scratch remover.
- Wax or Sealant: To protect the repaired area.
- Applicator Pads: For applying compounds and waxes.
- Polishing Machine (Optional): For faster and more effective polishing.
- Touch-Up Paint (Matching Your Car’s Color): For deeper scratches that expose the primer or metal.
- Fine-Tip Brush: For applying touch-up paint precisely.
- Sandpaper (Various Grits): For leveling touch-up paint.
- Rubbing Alcohol: For cleaning surfaces before applying touch-up paint.
Step-by-Step Guide to Removing Paint Scrapes
Now that you understand the different types of scratches and have gathered the necessary tools, let’s walk through the process of removing paint scrapes from your car.
Step 1: Wash and Dry the Area
Begin by thoroughly washing the area around the paint scrapes with car wash soap and water. This will remove any dirt, grime, or debris that could interfere with the repair process. Rinse the area well and dry it with a clean microfiber towel.
Step 2: Clay Bar Treatment
Use a clay bar to remove any embedded contaminants from the paint surface. Spray the area with detailing spray and gently rub the clay bar back and forth over the surface. The clay bar will lift away any impurities, leaving the paint smooth and clean. [See also: How to Detail Your Car Like a Pro] Wipe away any residue with a clean microfiber towel.
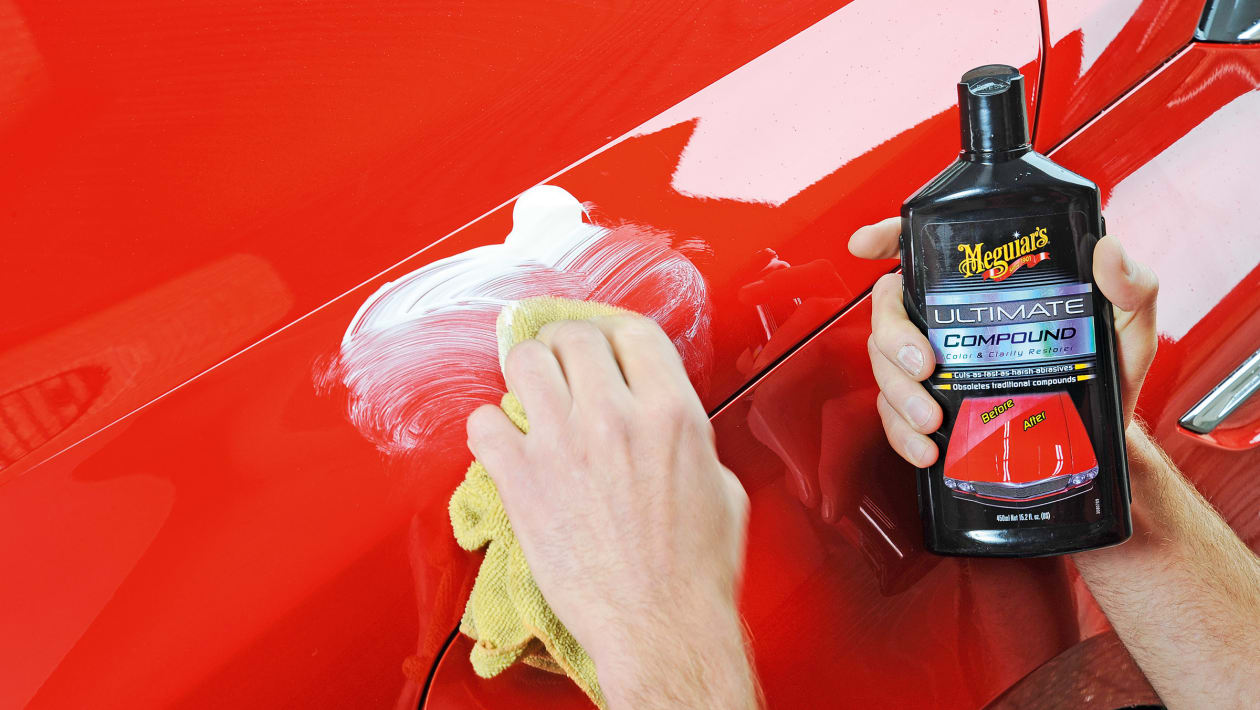
Step 3: Apply Scratch Remover Compound
Apply a small amount of scratch remover compound to an applicator pad. Gently rub the compound onto the paint scrapes using a circular motion. Apply moderate pressure and work the compound into the scratches for several minutes. If you are using a polishing machine, follow the manufacturer’s instructions for applying the compound. The goal is to reduce the appearance of the scratches by smoothing out the edges of the surrounding paint.
Step 4: Polish the Area
After using the scratch remover compound, apply a polishing compound to an applicator pad. This will help to refine the finish and remove any swirl marks left by the scratch remover. Again, use a circular motion and apply moderate pressure. If you are using a polishing machine, follow the manufacturer’s instructions. Polishing will restore the shine and clarity of the paint.
Step 5: Apply Wax or Sealant
To protect the repaired area, apply a coat of wax or sealant. This will help to prevent further damage and keep the paint looking its best. Apply the wax or sealant according to the manufacturer’s instructions. Buff the area with a clean microfiber towel to achieve a smooth, glossy finish.
Dealing with Deeper Paint Scrapes
If the paint scrapes are deep enough to expose the primer or metal, you’ll need to take additional steps to prevent rust and corrosion.
Step 1: Clean the Scratch
Thoroughly clean the scratch with rubbing alcohol to remove any dirt, grease, or rust. This will ensure that the touch-up paint adheres properly.
Step 2: Apply Touch-Up Paint
Using a fine-tip brush, carefully apply touch-up paint to the scratch. Apply thin, even coats, allowing each coat to dry completely before applying the next. Build up the paint until it is slightly higher than the surrounding paint surface. It is crucial to match the paint to your vehicle’s exact color code for best results. [See also: Understanding Car Paint Codes]
Step 3: Sand the Touch-Up Paint
Once the touch-up paint is completely dry, use fine-grit sandpaper (e.g., 2000-grit or 3000-grit) to carefully level the paint. Wrap the sandpaper around a sanding block and wet-sand the area using light pressure. The goal is to blend the touch-up paint with the surrounding paint surface. Be careful not to sand too aggressively, as this could damage the surrounding paint.
Step 4: Polish the Area
After sanding, polish the area with a polishing compound to restore the shine and clarity of the paint. Use an applicator pad or a polishing machine, and follow the manufacturer’s instructions. Polishing will remove any sanding marks and create a smooth, seamless finish.
Step 5: Apply Wax or Sealant
Finally, apply a coat of wax or sealant to protect the repaired area and enhance the shine. This will help to prevent further damage and keep the paint looking its best.
When to Seek Professional Help
While many paint scrapes can be repaired at home, there are situations where it’s best to seek professional help. If the scratches are very deep, extensive, or located in a difficult-to-reach area, it’s often worth the investment to have a professional body shop handle the repairs. They have the expertise, tools, and materials to restore your car’s paint to its original condition. Additionally, attempting a DIY repair on a severely damaged area could potentially make the problem worse, leading to more costly repairs in the long run.
Preventing Future Paint Scrapes
Prevention is always better than cure. Here are some tips to help you prevent future paint scrapes on your car:
- Park Carefully: Avoid parking too close to other vehicles or objects that could potentially scratch your car.
- Maintain a Safe Following Distance: When driving, maintain a safe following distance to avoid being hit by flying debris.
- Wash Your Car Regularly: Regular washing helps to remove dirt, grime, and other contaminants that could scratch the paint.
- Apply a Protective Coating: Consider applying a ceramic coating or paint protection film to provide an extra layer of protection against scratches and other damage.
- Be Mindful of Your Surroundings: Pay attention to your surroundings when driving or parking, and avoid areas where your car could be at risk of damage.
Conclusion
Dealing with paint scrapes on your car can be frustrating, but with the right knowledge and tools, you can often repair them yourself. By understanding the severity of the scratch, using the appropriate techniques, and taking preventive measures, you can keep your car looking its best for years to come. Remember to assess the damage carefully before starting any repair work, and don’t hesitate to seek professional help if you’re unsure about any aspect of the process. By following the steps outlined in this guide, you can effectively get paint scrapes off your car and maintain its value and appearance.
