How to Repair Surface Rust on Your Car: A Comprehensive Guide
Surface rust is a common problem for car owners, especially those living in areas with harsh weather conditions. It’s that unsightly orange discoloration that appears on the car’s body, often around scratches, dents, or areas where the paint has chipped away. While it might seem like a minor cosmetic issue initially, neglecting how to repair surface rust on car can lead to more serious problems down the line, including structural damage and costly repairs. This guide provides a detailed, step-by-step approach to tackling surface rust effectively, ensuring your car stays in good condition for years to come.
Understanding Surface Rust
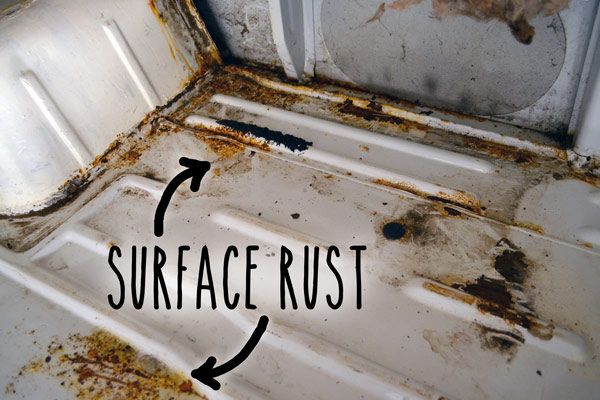
Before diving into the repair process, it’s crucial to understand what surface rust is and how it differs from more severe forms of corrosion. Surface rust, as the name suggests, affects only the outermost layer of the metal. It’s primarily a cosmetic issue, but if left untreated, it can penetrate deeper, leading to structural rust, which compromises the integrity of the car’s body.
Several factors contribute to the formation of surface rust, including:
- Exposure to Moisture: Rain, snow, and humidity accelerate the rusting process.
- Road Salt: In colder climates, road salt used to de-ice roads is a major culprit.
- Scratches and Chips: These expose the bare metal to the elements, making it vulnerable to rust.
- Environmental Pollutants: Industrial pollutants and acid rain can also contribute to corrosion.
Tools and Materials Needed
To effectively repair surface rust on car, you’ll need the following tools and materials:
- Safety Glasses and Gloves: Protect yourself from dust and chemicals.
- Sandpaper (various grits): Typically, you’ll need 80, 120, 220, 320, and 400 grit sandpaper.
- Wire Brush: For removing loose rust.
- Rust Converter: To neutralize remaining rust.
- Body Filler (optional): For filling in minor imperfections.
- Primer: To prepare the surface for painting.
- Car Paint (matching your car’s color): Available in spray cans or as touch-up paint.
- Clear Coat: To protect the paint and add shine.
- Wax and Grease Remover: To clean the surface.
- Tack Cloth: To remove dust before painting.
- Masking Tape and Paper: To protect surrounding areas.
- Clean Rags: For wiping and cleaning.
- Sanding Block (optional): For even sanding.
Step-by-Step Guide to Repairing Surface Rust
Follow these steps carefully to repair surface rust on car and restore its appearance:
Step 1: Preparation
Start by thoroughly washing the area around the rust with soap and water. This removes dirt and grime that could interfere with the repair process. Dry the area completely. Then, use masking tape and paper to protect the surrounding paint from sanding and painting. Good preparation is key to a professional-looking finish.
Step 2: Removing Loose Rust
Use a wire brush or coarse sandpaper (80-grit) to remove any loose rust flakes. Apply moderate pressure and work in circular motions. The goal is to remove as much of the rust as possible without damaging the underlying metal. Be thorough in this step; any remaining loose rust will compromise the repair.
Step 3: Sanding the Area
Once the loose rust is removed, use progressively finer grits of sandpaper to smooth out the area. Start with 120-grit, then move to 220-grit, 320-grit, and finally 400-grit. Sand beyond the rusted area to feather the edges and create a smooth transition between the repaired area and the surrounding paint. This will help the new paint blend seamlessly.
Step 4: Applying Rust Converter
After sanding, clean the area with wax and grease remover to remove any residue. Apply a rust converter to the affected area according to the manufacturer’s instructions. Rust converter chemically neutralizes any remaining rust, preventing it from spreading. Allow the rust converter to dry completely before proceeding to the next step. This is a critical step in ensuring the longevity of the repair.
Step 5: Applying Body Filler (Optional)
If the surface is uneven or has minor imperfections, you can use body filler to create a smooth surface. Mix the body filler according to the manufacturer’s instructions and apply it to the affected area. Allow it to dry completely, then sand it smooth using progressively finer grits of sandpaper, starting with 220-grit and finishing with 400-grit. If you’re unfamiliar with using body filler, consider watching a tutorial video or practicing on a scrap piece of metal first. [See also: How to Apply Automotive Body Filler]
Step 6: Priming the Area
Clean the area with a tack cloth to remove any dust. Apply several thin coats of primer to the prepared surface, allowing each coat to dry completely before applying the next. Primer provides a uniform surface for the paint to adhere to and helps to prevent rust from returning. Use a high-quality automotive primer for the best results. Sand the primer lightly with 400-grit sandpaper to smooth out any imperfections before painting.
Step 7: Painting the Area
Apply several thin coats of car paint to the primed surface, allowing each coat to dry completely before applying the next. Use a spray can or touch-up paint that matches your car’s color code. Hold the spray can about 8-10 inches from the surface and apply even, overlapping strokes. Avoid applying too much paint in one coat, as this can lead to runs and drips. Take your time and be patient; multiple thin coats are better than one thick coat.
Step 8: Applying Clear Coat
After the paint has dried completely, apply several thin coats of clear coat to protect the paint and add shine. Allow each coat to dry completely before applying the next. Clear coat also provides an extra layer of protection against the elements. Use a high-quality automotive clear coat for the best results. [See also: Best Clear Coat for Cars]
Step 9: Wet Sanding and Polishing (Optional)
For a flawless finish, you can wet sand the clear coat with 2000-grit sandpaper to remove any imperfections, such as orange peel. Then, use a polishing compound and a polishing pad to restore the shine. This step is optional but can significantly improve the appearance of the repair. If you’re not comfortable with wet sanding and polishing, consider taking your car to a professional detailer.
Step 10: Waxing the Area
Finally, apply a coat of wax to the repaired area to protect the paint and add shine. Wax also helps to repel water and prevent rust from returning. Use a high-quality automotive wax and apply it according to the manufacturer’s instructions. Regular waxing will help to keep your car looking its best and protect it from the elements.
Preventing Future Rust
Once you’ve successfully repair surface rust on car, it’s important to take steps to prevent it from returning. Here are some tips:
- Wash Your Car Regularly: This removes dirt, salt, and other contaminants that can contribute to rust.
- Wax Your Car Regularly: Wax provides a protective barrier against the elements.
- Repair Scratches and Chips Promptly: These expose the bare metal to the elements, making it vulnerable to rust.
- Apply Rust Inhibitor: Consider applying a rust inhibitor to areas prone to rust, such as the undercarriage.
- Store Your Car Indoors: If possible, store your car in a garage or carport to protect it from the elements.
When to Seek Professional Help
While you can repair surface rust on car yourself, there are times when it’s best to seek professional help. If the rust is extensive or has penetrated deep into the metal, it’s best to take your car to a body shop. They have the tools and expertise to properly repair the damage and prevent it from spreading. Additionally, if you’re not comfortable with any of the steps involved in the repair process, it’s always best to err on the side of caution and seek professional assistance.
Conclusion
How to repair surface rust on car doesn’t have to be a daunting task. With the right tools, materials, and a little patience, you can effectively remove surface rust and restore your car’s appearance. By following the steps outlined in this guide and taking steps to prevent future rust, you can keep your car looking its best for years to come. Remember to always prioritize safety and seek professional help when needed. Regularly inspecting your car for signs of rust and addressing them promptly will save you time, money, and headaches in the long run. Addressing surface rust early is crucial to preventing more significant structural damage and maintaining your vehicle’s value. [See also: Preventing Car Rust in Winter]
