
Removing Bike Pedals: Understanding Direction and Technique for Smooth Removal
Removing bike pedals might seem straightforward, but many cyclists, from beginners to seasoned riders, encounter difficulties. The key lies in understanding the direction of the threads and applying the correct technique. This article provides a comprehensive guide on how to remove bike pedals effectively and safely, covering everything from identifying the correct tools to troubleshooting common issues.
Why You Might Need to Remove Your Bike Pedals
There are several reasons why you might need to remove bike pedals. These include:
- Replacing worn-out pedals: Pedals wear out over time, affecting your riding efficiency and comfort.
- Upgrading to new pedals: You might want to switch to clipless pedals or a different type of platform pedal.
- Bike maintenance: Removing the pedals can simplify cleaning and lubricating the threads.
- Travel: Taking pedals off makes packing your bike easier and protects them during transport.
Understanding Pedal Thread Direction
The most critical aspect of removing bike pedals is understanding the thread direction. Bike pedals are threaded differently to prevent them from unscrewing while riding. The right pedal (drive side) has a standard right-hand thread, meaning you loosen it by turning it counter-clockwise. The left pedal (non-drive side) has a left-hand thread, meaning you loosen it by turning it clockwise. This difference is crucial to avoid stripping the threads.
Identifying Left and Right Pedals
Most pedals are marked with an “L” (left) or “R” (right”. If the markings are worn or missing, you can usually identify them by the way they are installed on the bike. The right pedal is always on the same side as the chainrings.
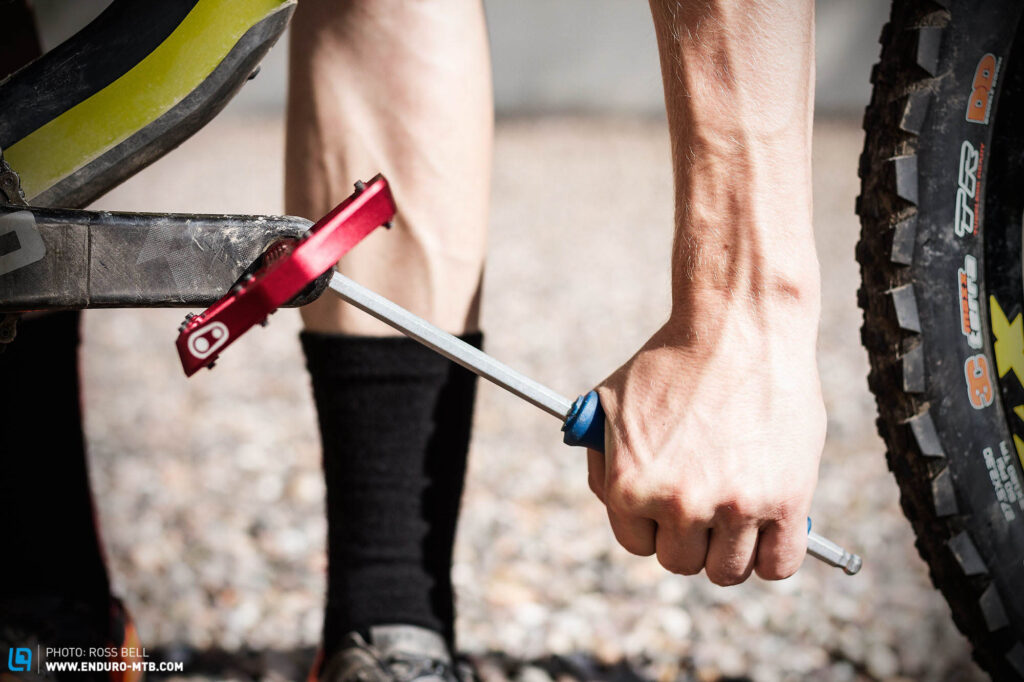
Tools Needed to Remove Bike Pedals
Before you begin, gather the necessary tools:
- Pedal wrench: A pedal wrench is a long-handled wrench specifically designed for removing bike pedals. It usually has a 15mm opening.
- Allen wrench (hex key): Some pedals use an Allen wrench fitting on the inside of the crank arm. Check your pedals to see if they require an Allen wrench instead of a pedal wrench.
- Lubricant: A penetrating lubricant like WD-40 or a specialized bike lubricant can help loosen stubborn pedals.
- Gloves: Protect your hands from grease and sharp edges.
- Rag: For cleaning up any excess lubricant or dirt.
Step-by-Step Guide to Removing Bike Pedals
Follow these steps to safely and effectively remove bike pedals:
- Prepare the bike: Secure your bike in a repair stand or lean it against a wall. Make sure it’s stable to prevent accidents.
- Apply lubricant: Spray a small amount of lubricant around the pedal axle where it meets the crank arm. Let it sit for a few minutes to penetrate the threads.
- Position the wrench: Place the pedal wrench or Allen wrench onto the pedal axle. Ensure it is fully seated to avoid slipping.
- Remove the right pedal: Turn the wrench counter-clockwise to loosen the right pedal. It may require some force, especially if the pedal hasn’t been removed in a while. If it’s extremely tight, try using a longer wrench for more leverage.
- Remove the left pedal: Turn the wrench clockwise to loosen the left pedal. Remember, it has a left-hand thread.
- Clean the threads: Once the pedals are removed, clean the threads on both the pedals and the crank arms with a rag.
Troubleshooting Common Issues
Sometimes, removing bike pedals can be challenging. Here are some common issues and how to address them:
- Stuck pedals: If the pedals are stuck, apply more lubricant and let it sit for a longer period. You can also try tapping the end of the wrench with a rubber mallet to help break the bond.
- Stripped threads: If the threads are stripped, you may need to use a thread repair kit or replace the crank arm. Prevention is key: always use the correct tools and thread direction.
- Insufficient leverage: If you can’t generate enough force, use a longer wrench or a cheater bar (a pipe that fits over the wrench handle) to increase leverage.
Tips for Installing New Bike Pedals
Once you’ve removed bike pedals, installing new ones is relatively straightforward. Here are some tips:
- Apply grease: Before installing the new pedals, apply a thin layer of grease to the threads. This will prevent them from seizing and make future removal easier.
- Start by hand: Thread the pedals into the crank arms by hand. Make sure they are aligned correctly to avoid cross-threading.
- Tighten securely: Use a pedal wrench or Allen wrench to tighten the pedals securely. Be careful not to overtighten, as this can damage the threads.
- Check periodically: After a few rides, check the pedals to ensure they are still tight.
Choosing the Right Bike Pedals
Selecting the right bike pedals depends on your riding style and preferences. Here are some common types:
- Platform pedals: These are flat pedals that provide a large surface area for your feet. They are suitable for casual riding, commuting, and mountain biking.
- Clipless pedals: These pedals require special shoes with cleats that clip into the pedal mechanism. They offer greater efficiency and control, making them popular for road cycling and competitive mountain biking.
- Hybrid pedals: These pedals have a platform on one side and a clipless mechanism on the other, providing versatility for different types of riding.
The Importance of Regular Bike Maintenance
Regular bike maintenance, including checking and removing bike pedals when necessary, is essential for ensuring your bike’s performance and longevity. By keeping your pedals clean, lubricated, and properly tightened, you can prevent problems and enjoy a smoother, more efficient ride. Neglecting pedal maintenance can lead to seized threads, damaged crank arms, and even accidents.
Advanced Techniques for Stubborn Pedals
Sometimes, even with lubricant and leverage, pedals refuse to budge. In such cases, consider these advanced techniques:
- Heat: Applying heat to the crank arm can help expand the metal and loosen the threads. Use a heat gun or hair dryer, being careful not to damage the paint.
- Impact wrench: An impact wrench can deliver short bursts of high torque, which can break the bond between the pedal and crank arm. This should be used with caution to avoid stripping the threads.
- Professional help: If you’ve tried everything and still can’t remove bike pedals, take your bike to a professional mechanic. They have specialized tools and experience in dealing with stubborn pedals.
Ultimately, the process of removing bike pedals is a skill that every cyclist should learn. By understanding the thread direction, using the correct tools, and following the proper techniques, you can maintain your bike and enjoy a smoother, more efficient ride. Remember to always prioritize safety and seek professional help when needed.
Regular maintenance, including the ability to remove bike pedals, contributes to a safer and more enjoyable cycling experience. Don’t underestimate the importance of proper tools and techniques when dealing with bicycle components. Taking the time to learn and practice these skills will save you time and money in the long run.
Mastering the art of removing bike pedals and understanding the nuances of pedal maintenance is a valuable asset for any cyclist. Whether you’re upgrading your equipment, performing routine maintenance, or preparing your bike for travel, knowing how to safely and effectively remove your pedals is a skill that will serve you well. Remember to always double-check the thread direction and use the appropriate tools to avoid damaging your bike.
By following this guide, you’ll be well-equipped to tackle the task of removing bike pedals with confidence. Happy cycling!
[See also: Bike Maintenance Tips for Beginners]
[See also: Choosing the Right Bike Pedals for Your Riding Style]
[See also: How to Clean and Lubricate Your Bike Chain]
