The Ultimate Guide to Removing Stickers from Your Car Without Damage
Stickers on your car can be a fun way to express your personality or show support for your favorite causes. However, the time inevitably comes when you want to remove them. Whether it’s an outdated parking permit, a faded bumper sticker, or simply a change in your aesthetic preferences, removing stickers from your car requires a careful approach to avoid damaging the paint or leaving behind unsightly residue. This comprehensive guide will walk you through various methods and best practices for safely and effectively removing stickers from your car.
Why Removing Stickers Carefully Matters
Before diving into the methods, it’s crucial to understand why a gentle approach is essential. Car paint is a delicate layer, and aggressive techniques can lead to scratches, swirl marks, or even peeling. Furthermore, the adhesive used in stickers can leave behind a sticky residue that’s difficult to remove. By using the right tools and techniques, you can remove stickers from your car without causing any permanent harm.
Tools and Materials You’ll Need
Gathering the necessary supplies beforehand will streamline the removing stickers from your car process. Here’s a list of essential items:
- Heat gun or hair dryer
- Plastic razor blade or scraper
- Microfiber cloths
- Adhesive remover (e.g., Goo Gone, WD-40, or isopropyl alcohol)
- Warm, soapy water
- Detailing spray or wax (for finishing)
Methods for Removing Stickers from Your Car
Using Heat to Soften the Adhesive
Heat is a powerful tool for softening the adhesive, making it easier to peel off the sticker. This method is generally safe for most car surfaces, but it’s crucial to use it cautiously.
- Prepare the area: Clean the sticker and the surrounding area with warm, soapy water to remove any dirt or debris.
- Apply heat: Hold a heat gun or hair dryer a few inches away from the sticker and move it back and forth in a sweeping motion. Avoid focusing the heat on one spot for too long, as this could damage the paint.
- Peel carefully: Once the sticker is warm, use a plastic razor blade or your fingernail to gently lift an edge of the sticker. Slowly peel the sticker away from the surface, continuing to apply heat as needed.
- Remove residue: If any adhesive residue remains, proceed to the next step.
Applying Adhesive Remover
Adhesive removers are specially formulated to dissolve the sticky residue left behind by stickers. Several options are available, each with its own strengths and weaknesses.
- Goo Gone: A popular choice, Goo Gone is effective at removing a wide range of adhesives. Apply it to the residue, let it sit for a few minutes, and then wipe it away with a microfiber cloth.
- WD-40: While primarily a lubricant, WD-40 can also dissolve adhesives. Spray it onto the residue, let it soak for a few minutes, and then wipe it off.
- Isopropyl alcohol: A readily available option, isopropyl alcohol can be effective for removing light adhesive residue. Apply it to a microfiber cloth and gently rub the residue until it dissolves.
Always test the adhesive remover on an inconspicuous area of your car’s paint before applying it to the entire sticker area. This will ensure that it doesn’t damage the paint or clear coat.
Using a Plastic Razor Blade
A plastic razor blade or scraper is an excellent tool for lifting the edges of the sticker and removing stubborn residue. Unlike metal blades, plastic blades are less likely to scratch the paint.
- Soften the residue: Apply heat or adhesive remover to soften the residue.
- Scrape gently: Hold the plastic razor blade at a shallow angle and gently scrape the residue away from the surface. Avoid applying too much pressure, as this could still scratch the paint.
- Wipe clean: Use a microfiber cloth to wipe away the loosened residue.
The Dental Floss Trick
For stickers that are particularly thin or difficult to peel, dental floss can be surprisingly effective. The thin, strong floss can slide between the sticker and the car’s surface, helping to separate them.
- Prepare the floss: Take a length of dental floss and hold it taut between your fingers.
- Slide the floss: Gently slide the floss between the sticker and the car’s surface, using a sawing motion.
- Peel and remove: As the floss separates the sticker, peel it away from the surface.
- Remove residue: Clean any remaining residue with adhesive remover.
Preventing Damage While Removing Stickers
The key to removing stickers from your car without damage is patience and caution. Here are some additional tips to keep in mind:
- Work in a shaded area: Direct sunlight can heat the car’s surface and make the adhesive more difficult to remove.
- Avoid using metal tools: Metal scrapers or razor blades can easily scratch the paint. Stick to plastic tools.
- Don’t force it: If the sticker is not coming off easily, apply more heat or adhesive remover and try again.
- Clean thoroughly: After removing the sticker and residue, clean the area with warm, soapy water to remove any remaining chemicals.
Finishing Touches
Once you’ve successfully removed stickers from your car, it’s time to restore the paint’s shine. Apply a detailing spray or wax to the area to protect the paint and blend it with the surrounding surface. This will help to remove any swirl marks or minor imperfections caused by the removing stickers from your car process. [See also: Car Detailing Tips for Beginners]
Addressing Specific Types of Stickers
Different types of stickers may require slightly different approaches. Here’s a breakdown of how to handle some common types:
Parking Permits
Parking permits often use a strong adhesive to prevent them from being easily removed. The heat method, combined with a plastic razor blade, is usually the most effective approach. Take your time and apply heat evenly to soften the adhesive.
Bumper Stickers
Bumper stickers can be particularly challenging to remove, especially if they’ve been on the car for a long time. Start with the heat method and then use an adhesive remover to dissolve any stubborn residue. [See also: Best Car Cleaning Products]
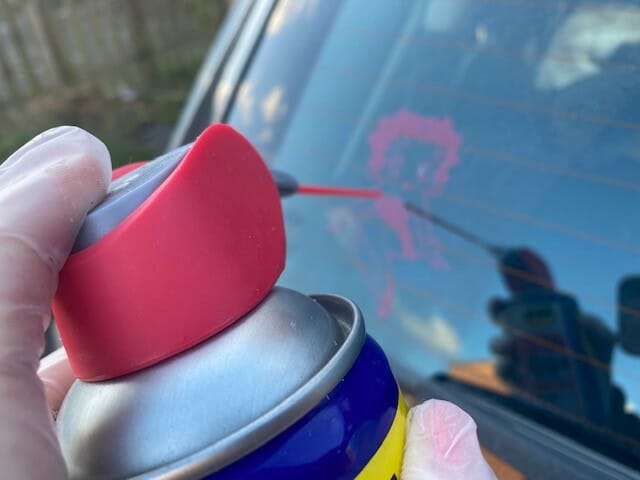
Window Stickers
Window stickers are generally easier to remove than stickers on painted surfaces. However, it’s still important to be careful not to scratch the glass. Use a plastic razor blade and window cleaner to remove the sticker and any residue.
When to Seek Professional Help
If you’re uncomfortable removing stickers from your car yourself, or if you’re dealing with a particularly stubborn sticker, it’s best to seek professional help. A professional detailer will have the tools and expertise to remove stickers from your car without damaging the paint. They can also address any paint imperfections that may have been caused by the sticker.
The Importance of Regular Maintenance
To prevent stickers from becoming too difficult to remove, it’s a good idea to remove them as soon as they’re no longer needed. Regular car washing and waxing can also help to protect the paint and make it easier to remove stickers from your car in the future. By following these tips, you can keep your car looking its best and avoid the frustration of dealing with stubborn stickers.
Conclusion
Removing stickers from your car doesn’t have to be a daunting task. By following these methods and using the right tools, you can safely and effectively remove stickers without damaging your car’s paint. Remember to be patient, work carefully, and always test any cleaning products on an inconspicuous area first. With a little effort, you can keep your car looking its best and enjoy a clean, sticker-free finish. The key is understanding the adhesive and finding the right combination of heat, chemicals, and gentle scraping to safely remove stickers from your car. Good luck!
